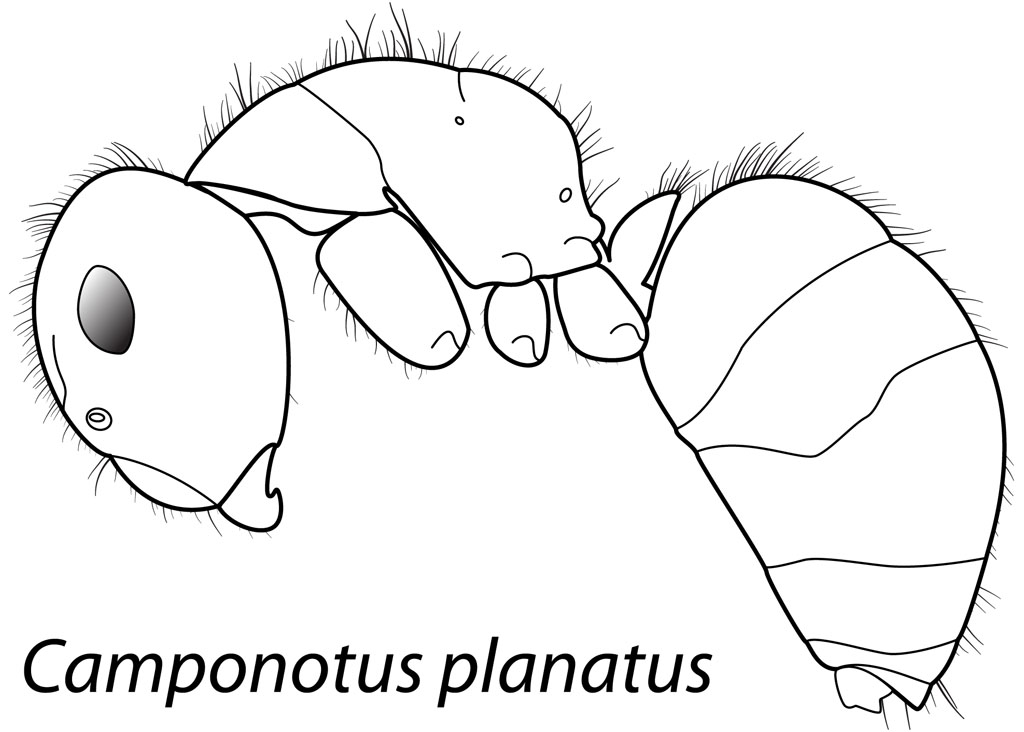
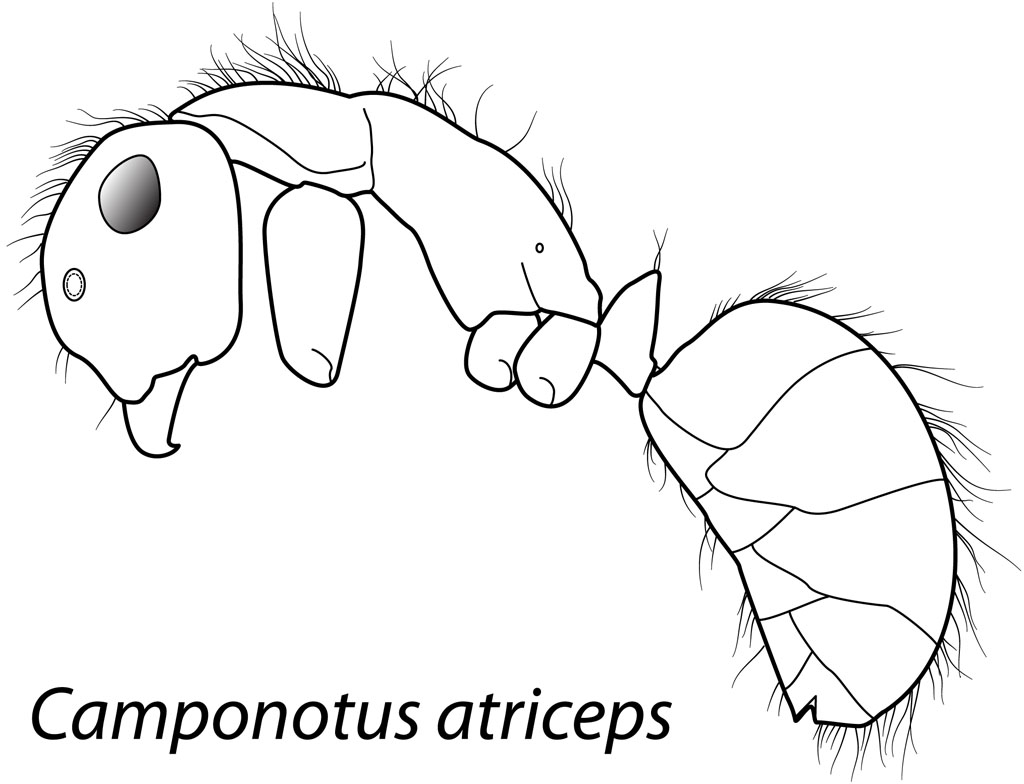
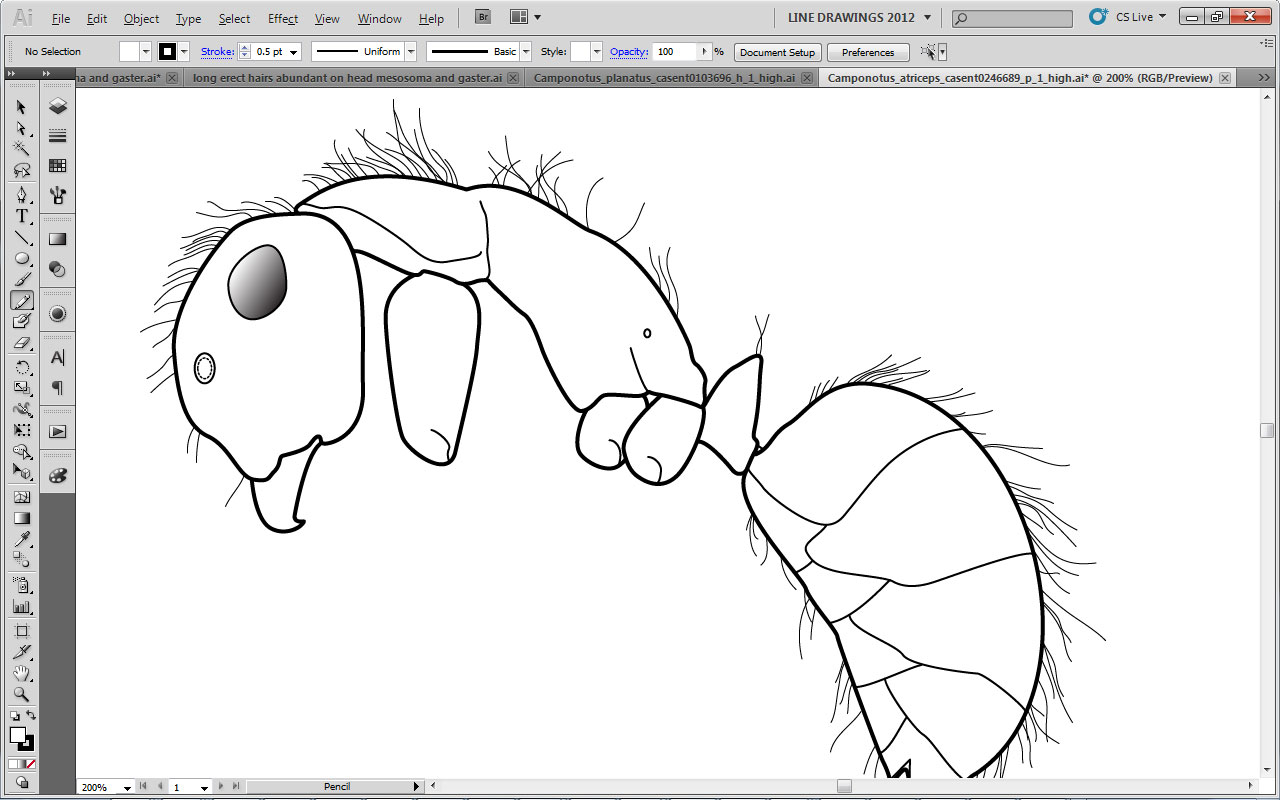
One of the most satisfying things to do when illustrating ants with Adobe Illustrator (AI) is to turn rather dull hairs into elegant tapered masterpieces. Hairs, or ‘setae’ as the traditionalists prefer, can be excellent characters for identification. For my introduced ant key, I need to come up with characters for distinguishing Camponotus planatus from Camponotus atriceps. I’ve coded both as having abundant long erect hairs on the head, mesosoma and gaster. But the quality of the hairs is different between these two. Those of C. planatus are stiff and thick, while those of C. atriceps are slender and flexuous. Here’s a quick post on how I drew the hairs for C. atriceps.
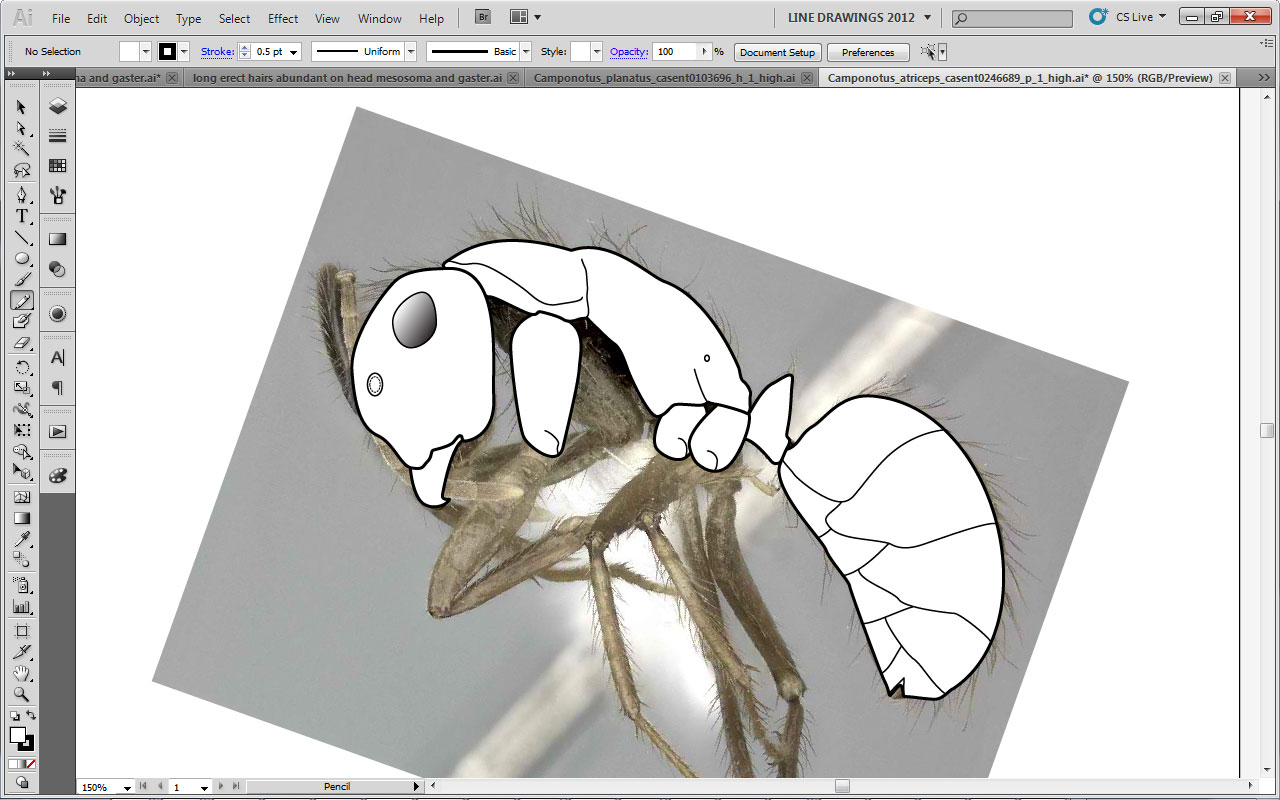
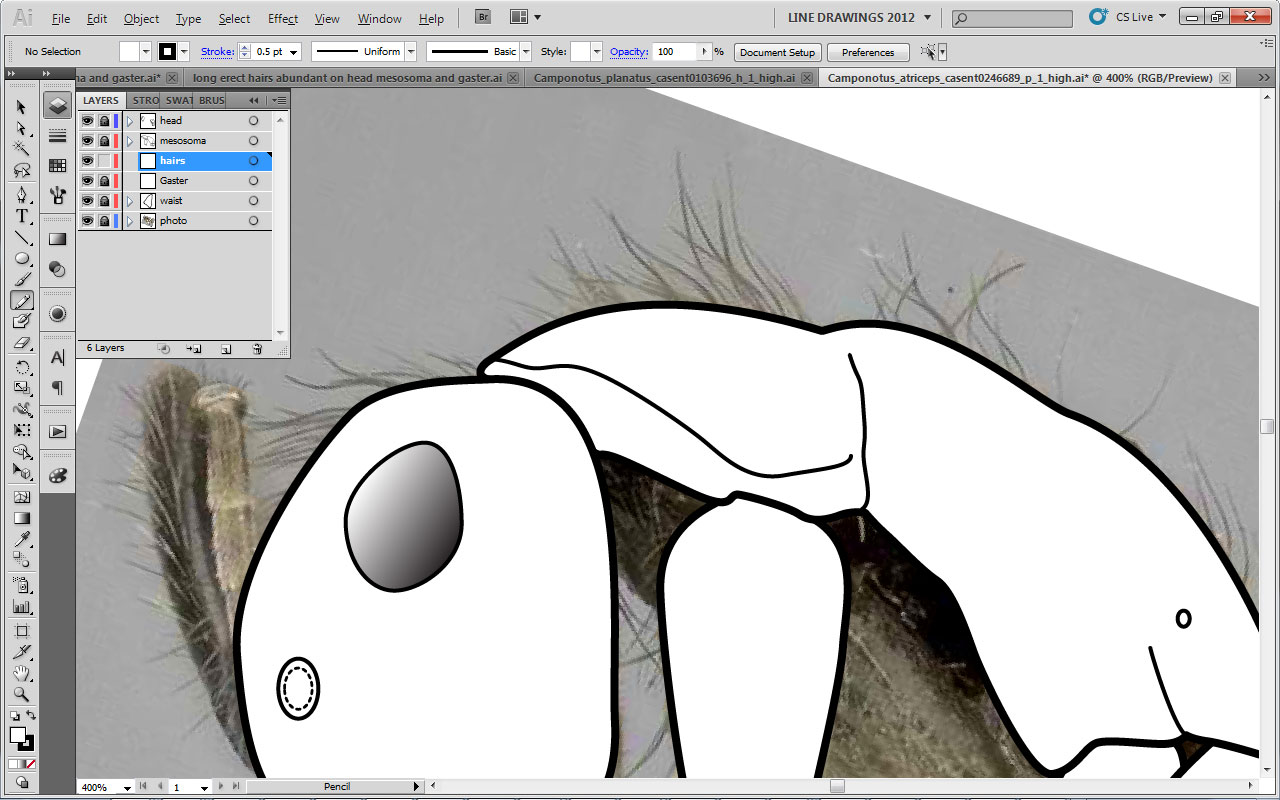
First thing was to import a photograph of C. atriceps from Antweb. I had to rotate it to the standard position where the back two coxae are level with each other.
Next I created new layers for the head, mesosoma, waist and gaster, and drew the outlines using the Pen tool. I hope to post more on these basic steps of tracing specimen images in the near future.
Now I create a new layer for the hairs, and lock all of the other layers.
The next step is to trace the hairs. There are a few ways to do this, but the trick is to achieve a nice smooth curve. With hairs, I like to use the Pencil tool and trace on my x200 Thinkpad tablet. Before I had my tablet, though, I would probably stick with the Pen tool for these type of long flexuous hairs. If you do opt for the Pencil tool, make sure to double click on it and select a nice smoothness (I used 75%) and get rid of the ‘edit paths’ option for sure.
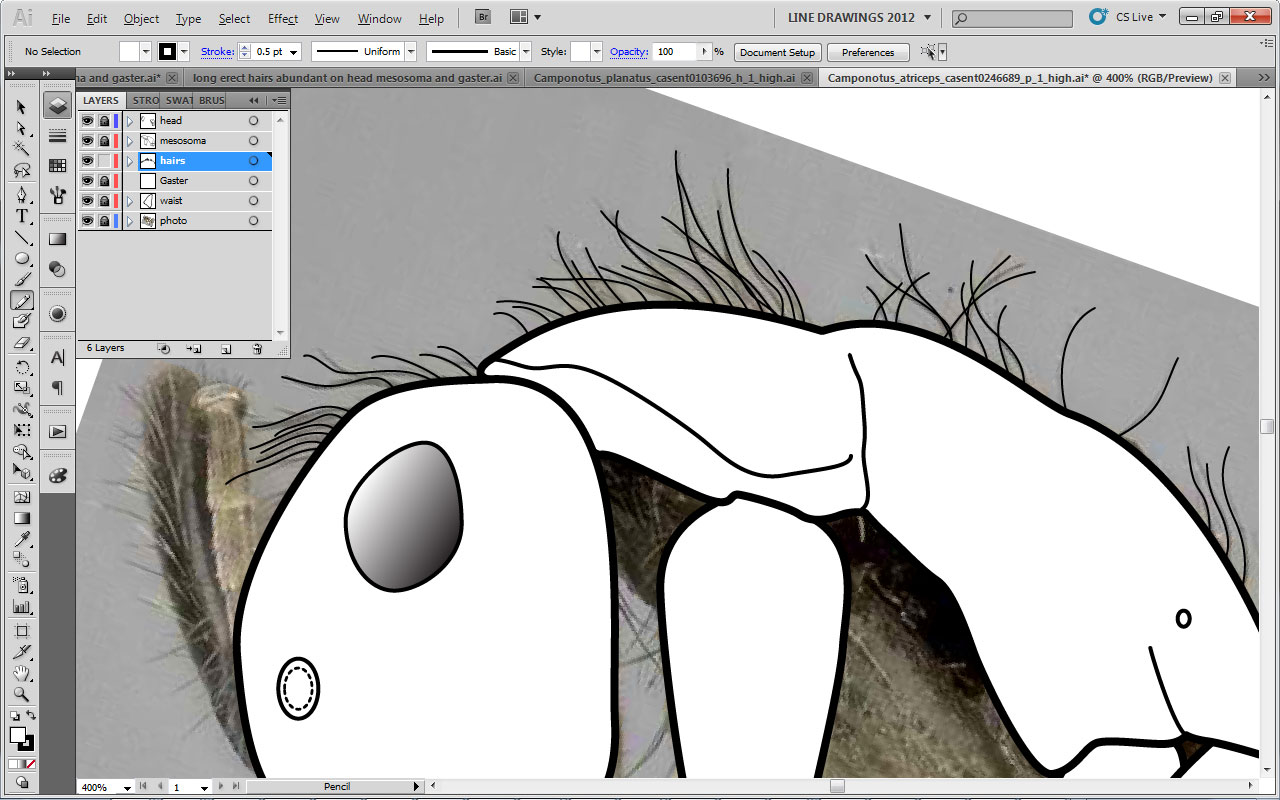
Hairs are traced using the Pencil tool with a tablet, but the Pen tool works well for these as well.
Once I’ve traced all the hairs on the profile outline, I hide the specimen photograph layer to see how it looks.
Here comes the cool part: making a new hair type.
- Use the pen tool to draw a straight line approximately as long as one of the longer hairs. Change the stroke to 0.25.
- Select the line and copy it (Control+C).
- Paste the line to the back (Control+B). This pastes the copy directly behind the original.
- Use the ‘Direct Select’ tool (A) and drag a selection box around the top two points (it looks like just one point because the copy is directly behind the original). Now join the two selected points. I do this by right clicking and selecting ‘Join’, but I’m sure there are other ways to get there.
- Again using the Direct Select tool, click on one of the bottom points. Use the arrow keys to move it a few pixels to the left. I changed the default keyboard increment (Edit > Preferences > General) to .001 in to have a bit more precision.
- Now select the other bottom point and move it an equal number of spaces to the right.
- Draw a line joining these two bottom points.
- Use the ‘Add anchor point’ tool (+) to drop an anchor point in the middle of this bottom line.
- Select the middle anchor point and move it down a few spaces. Click it and hold with the ‘Convert anchor points’ tool (Shift+C) to add a little curve to the bottom line.
- Fill the resulting polygon with black (or you could go for a gray if they are very light hairs if you want).
- Use the regular Selection tool (V) to select the whole object.
- Open the ‘Brushes’ window and create a new brush (lower right page icon in the window). Make it an Art Brush.
- Name the brush, and make sure the arrow is pointing upwards towards the pointy end (so long as you drew the hairs from the base to the tip). Save the brush library as ‘Ant Hairs’ or something like that. Sometimes if the following steps don’t work, I copy my hair to a new AI window and make a new brush. Some odd glitch or something, but sometimes it doesn’t save the brush correctly.
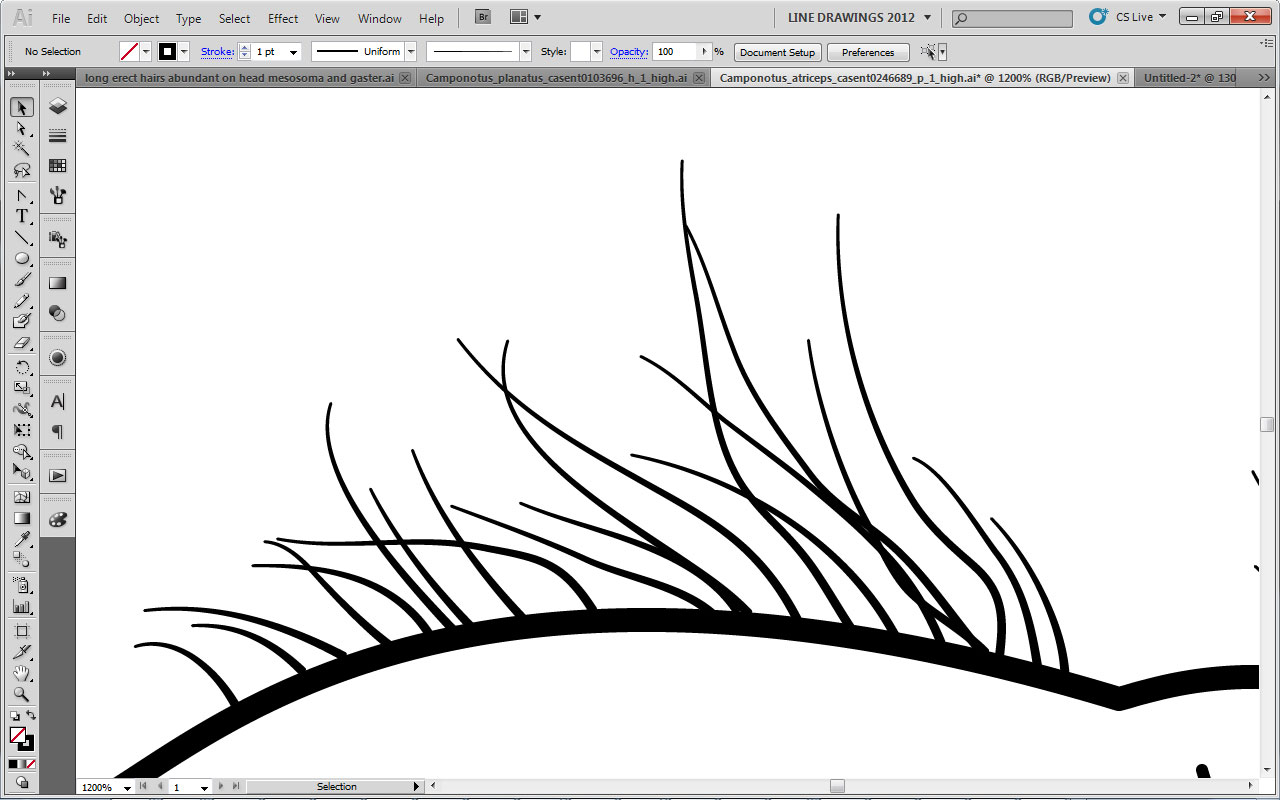
- Now select all your hairs. Easy way to do this is to make sure all the other layers are locked except for the hair layer, then do a ‘Select All’ command (Control+A). Click the new hair brush on the brush panel window, and voila. If the hairs are backwards, you may need to switch the way the arrow points in the brush options.
Now that you have the hair brush, you can paint hairs directly using the paintbrush tool. I find the paintbrush tool takes a lot longer, though, so I personally prefer using the pen or pencil tool, and then selecting all the strokes and converting them to brushstrokes with whichever ant hairs brush best suites the job.


Leave a Reply