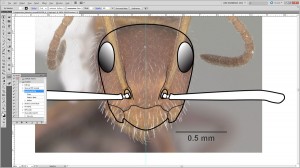
Here’s a brief tutorial on my technique for tracing ants heads from specimen photographs using Adobe Illustrator (AI) CS5. If you aren’t very familiar with AI, the best thing you can do is to read the AI help chapters on Drawing, Layers, and Selecting and Arranging objects. The bread and butter of AI is the pen tool, so make sure to read everything having to do with it. The pen tool is not particularly intuitive, and following whatever examples the help tutorials give will get you comfortable with paths and anchor points before diving into your first illustration. Also, mastering a few of the more common keyboard shorts for hand tool, pen tool, select, direct select, arrange, convert anchor points, etc. will save plenty of time in the long run. I’ll put shortcuts in parentheses throughout this post.
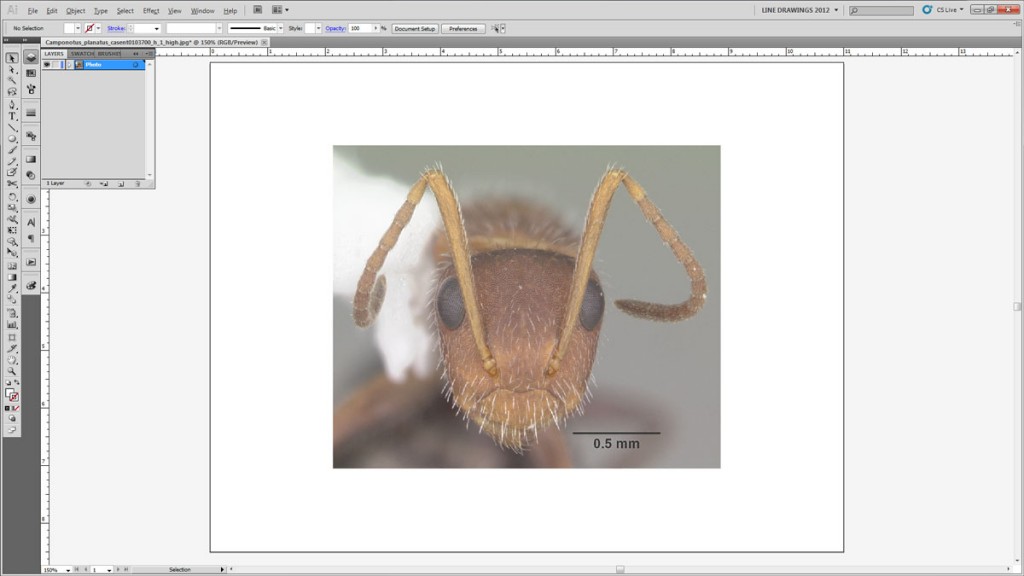
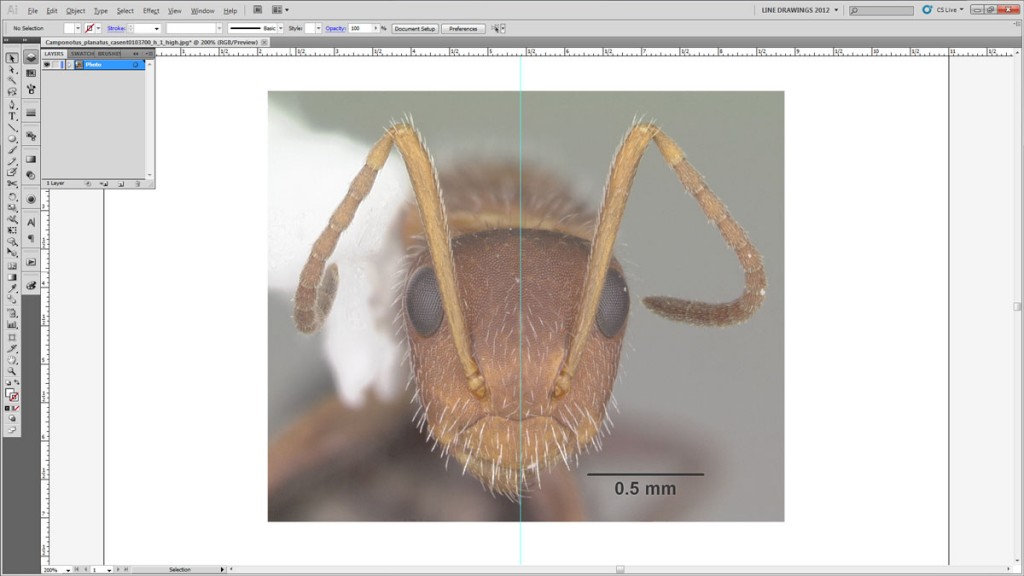
Step 1. Open the specimen photograph you plan to trace in AI. This will serve as your drawing template. Double click on the layer with the photo in the Layer Panel, and name the layer something like ‘Photo’ or ‘Specimen image’. Before closing the dialog box, also click the ‘Dim Images to’ box and put a number in between 80%-70%. Also, make sure you click the ‘Lock’ layer box. CS5 also has an option for selecting ‘Template’, which is a good idea, but not essential. When selecting your template image, look for ones with all the parts you plan to illustrate clearly showing (at least on one side of the face). For example, choose one with the full antennae showing (or at least all of one scape). Also, try for images that are positioned correctly. For example, notice on the Camponotus planatus specimen image I’m using, the right eye breaks the head outline while the left eye does not. Ideally, that discrepancy wouldn’t exist. Also, notice that the scapes block both the eyes. That’s one reason I like moving the antennal scapes down when I image my own specimens.
Step 2. Make a vertical guideline running down the middle of the face. To do this make sure the rulers are showing, then click and drag on the y-axis ruler to bring a guide out to where you need it. You can unlock the guide if you need to move it. If your specimen image is not perfectly level, unlock the photo template and rotate (r) the image until it is level, then lock it again.
Step 3. Create a new layer and call it something like ‘Face’.
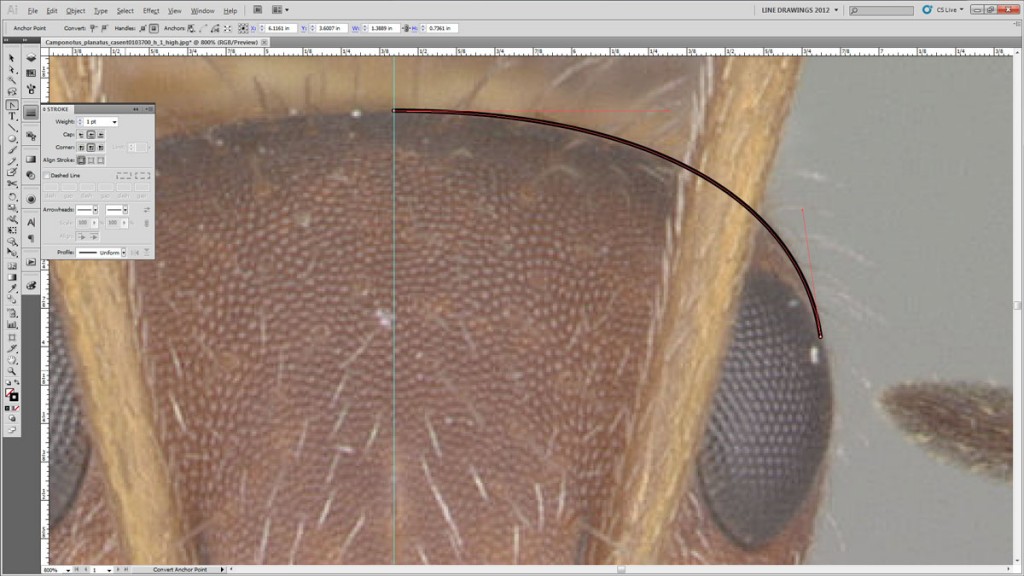
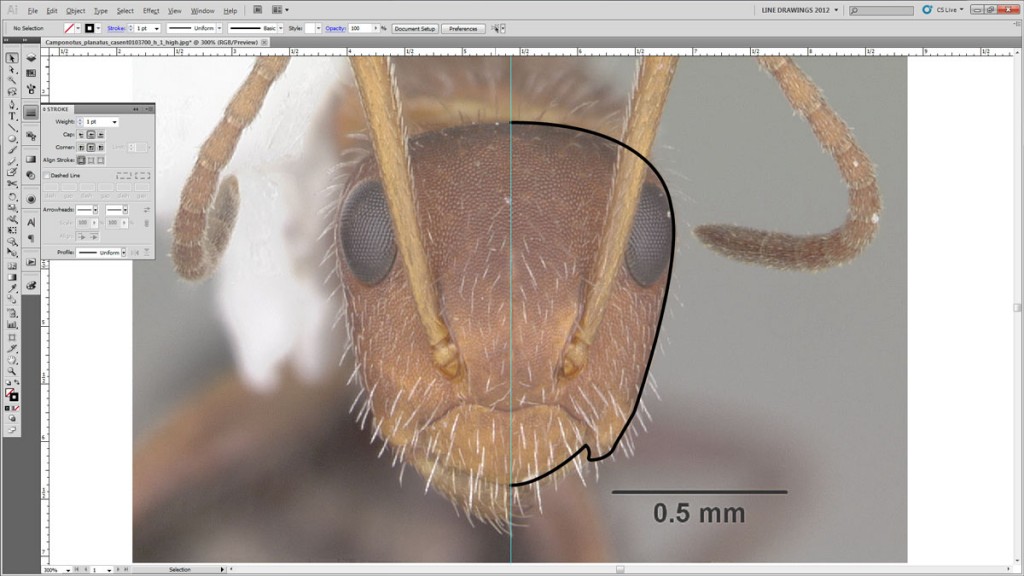
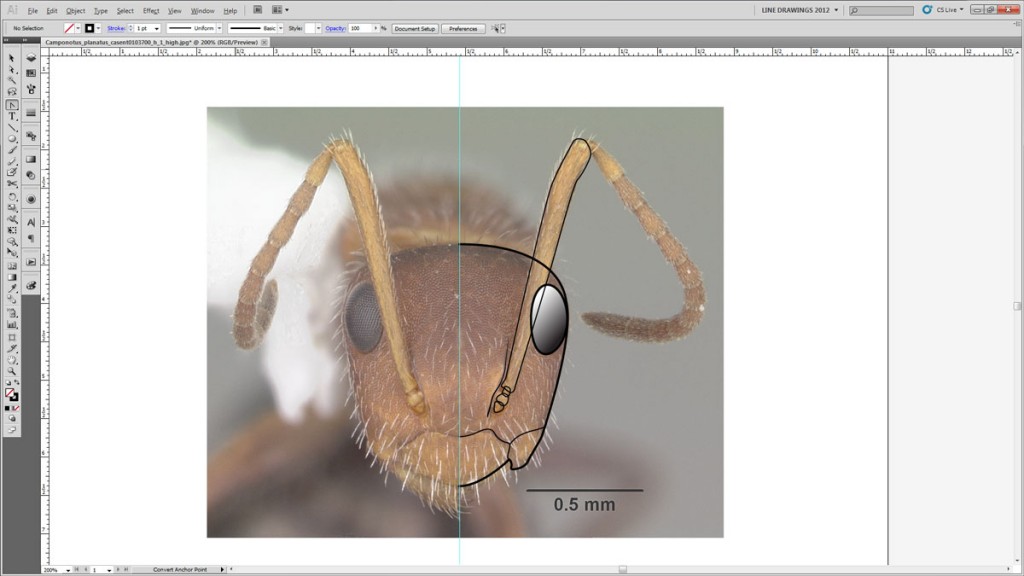
Step 4. Draw the outline of one half of the face. For some reason, I always do the right side, perhaps because it is not obscured by the paper point. The drawing is all done using the pen tool (p). I like to draw with a 1 point stroke with rounded ends (both of which options are available in the Stroke Panel).
Start at the mid-point top at the top of the head. Drop an anchor point while holding Shift to keep the handles perpendicular to the guide, and drag the anchors out a bit towards the sides of the head. This technique keeps a nice natural curve across the head when the two halves are joined later.
Now drop your anchor point, remembering to draw out the anchor handles each time. Drop as few anchor points as possible to make the most natural and smooth lines. You can adjust the curves as you go by using the direct select tool (a) and the convert anchor points tool (Shift+c). To continue your line, hover over the anchor point with your pen tool until you see the ‘/’ symbol, then click on it (or click and hold to draw out anchor handles).
Continue tracing along the outside of the face. If the eyes break the outline of the head, I just ignore them. I don’t include the mandibles until later in the process, preferring instead to follow the anterior margin of the clypeus until I hit the vertical guideline.
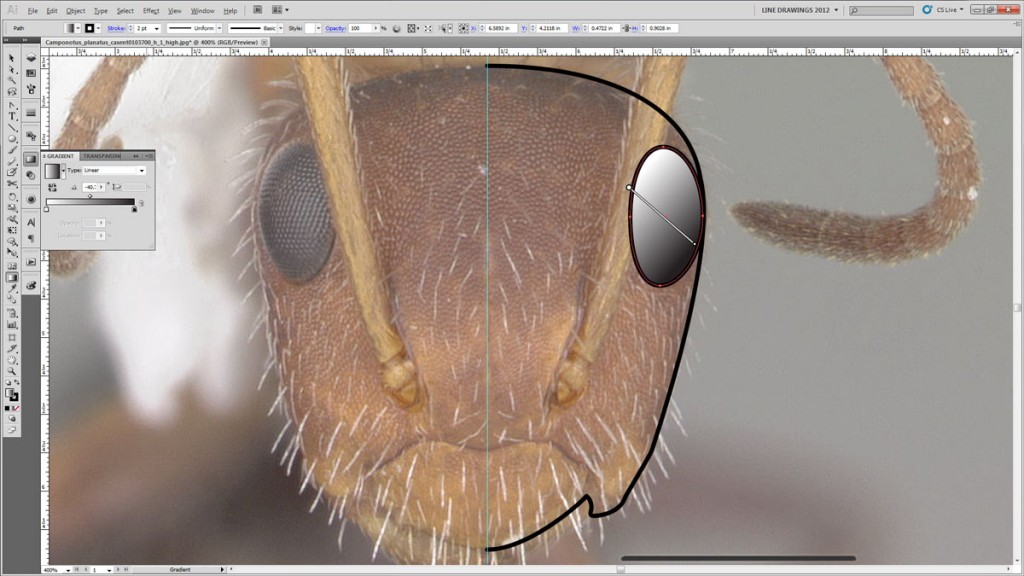
Step 5. Next I like to do the eyes. I use the Ellipse tool (L) while holding the Control button (to expand the ellipse from the midpoint) for the first rough approximation. Then I select the four anchor points with the direct select tool (A) and move them into place and make whatever other minor adjustments with anchor handles as necessary. Once I’m satisfied with the shape, I fill it with a gradient, then use the Gradient tool to approximate a 45 degree angle.
Step 6. Next I draw whatever interior characters seem appropriate. In this case I do the median and lateral potions of the clypeus and the frontal carinae. For the frontal carinae, I’ve started experimenting with different width profiles available in the Stroke panel, and with the Width tool (Shift+W) to make my own custom profiles. This allows the line to taper quite elegantly.
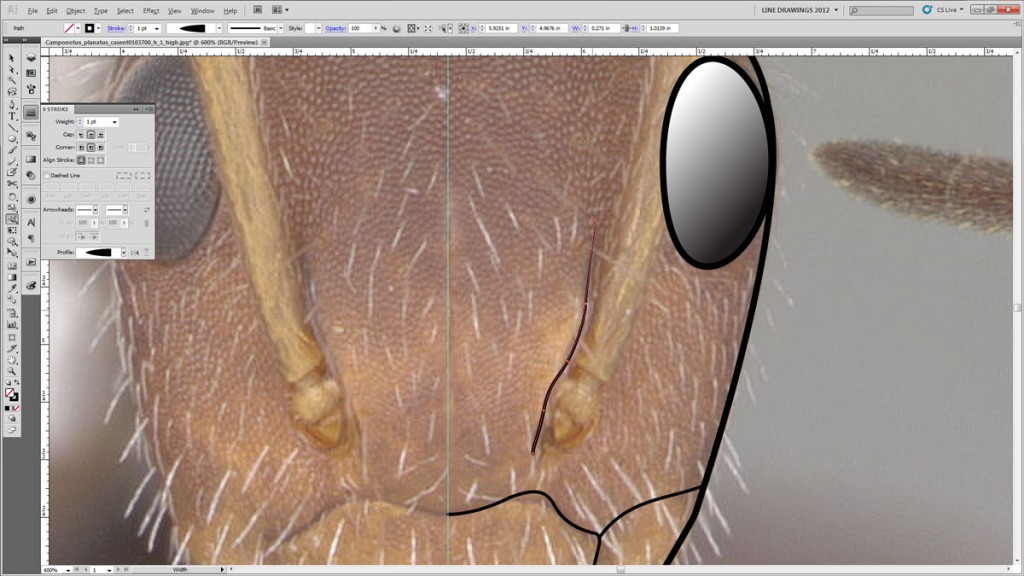
Drawing interior characters such as the frontal carinae and the clypeus. Notice the fine tapering of the frontal carinae achieved by a custom width profile available in CS5.
Step 7. The antennae are next. In general, it is best practice in AI to draw complete closed shapes when possible. That’s what I do with the antennal condyle and torulus and whatever that part is that is basal to the condyle. Sometimes I’ll do all the antennal segments, but more often I’ll just do the scape and leave it at that.
Once I’ve outlined and closed all the shapes of the antennae, I fill them with white and arrange them forwards (Control+]) and backwards (Control+[) to get them in the right order.
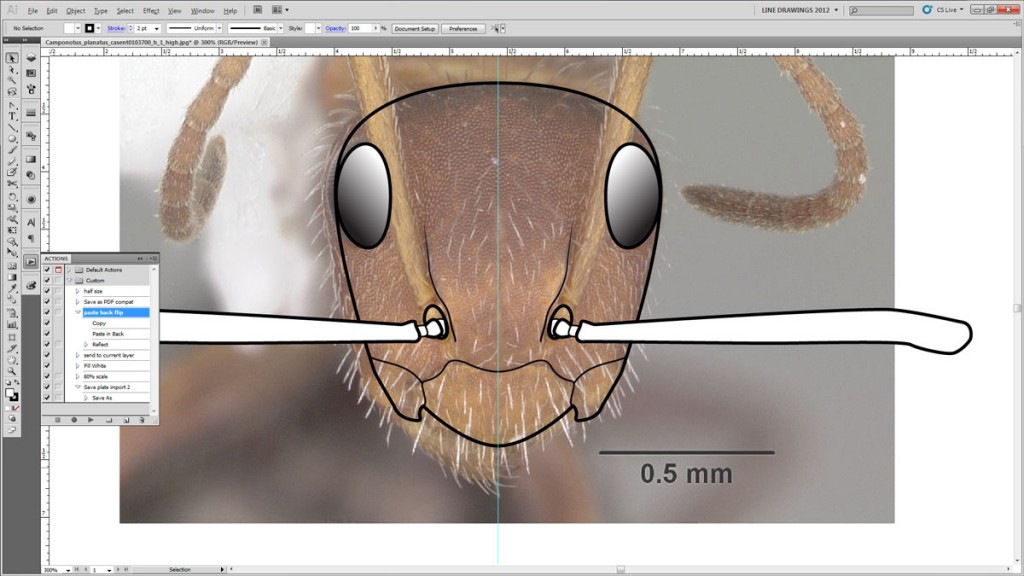
Step 8. Rotate (R) the antennal scape to horizontal position. I usually group the parts that I want to rotate together. This is my personal preference, but many other illustrators seem to prefer the scape aimed towards the posterolateral corner of the head. Up to you!
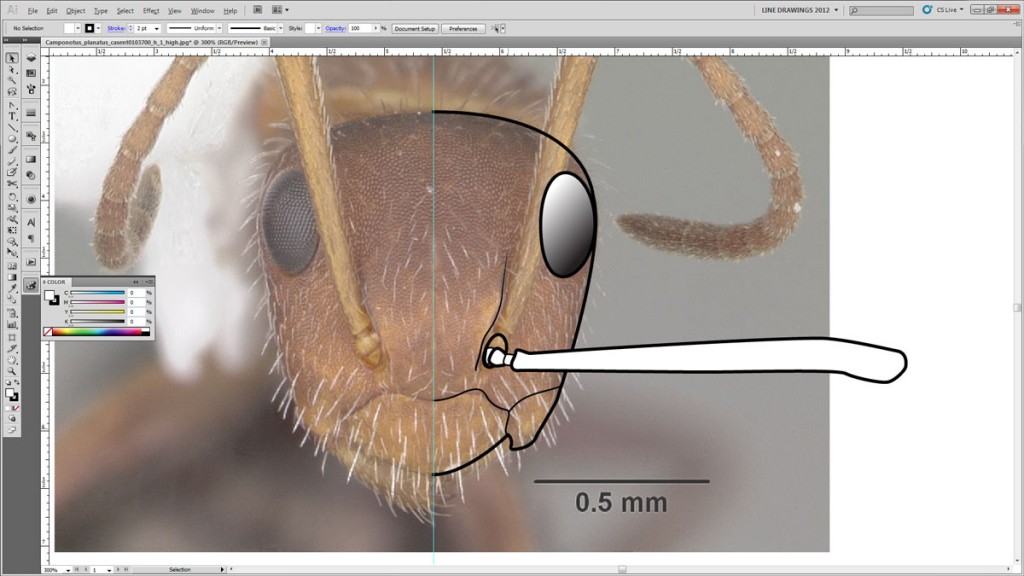
Scape rotated to horizontal position. This keeps it from obstructing the face, but doesn't allow you to see how much it exceeds (if at all) the posterior margin of the head.
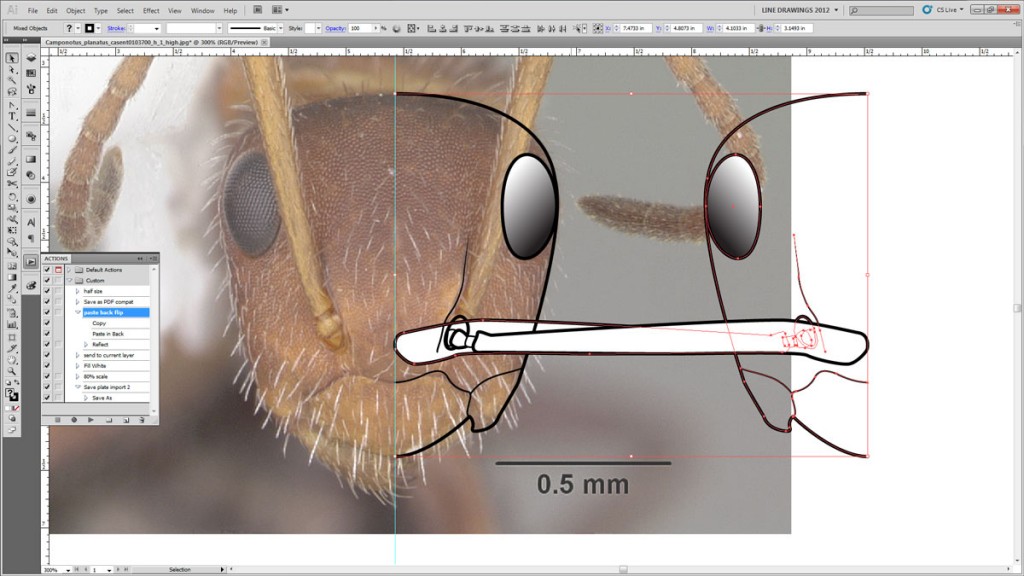
Step 9. Copy and flip your artwork. Select all your artwork, copy it, paste it to back (Control+B), and flip it across its vertical axis (Transform > Reflect).
Step 10. Then, while the copy is all selected, drag it while holding down Shift (to keep it on the same axis) until the midpoints of the head line up exactly. Select pairing points where they meet at the midline with the direct select tool (A) and join them, each in turn. This is essential for when the shapes are filled with color.
Sometimes the outline will be narrower than the actual specimen image. When this happens, I select everything with the regular selection tool (V) then drag one of the sides out. This makes all the shapes wider proportionally, so it introduces a little discrepancy (of the eyes for example) in return for a more accurate head width.
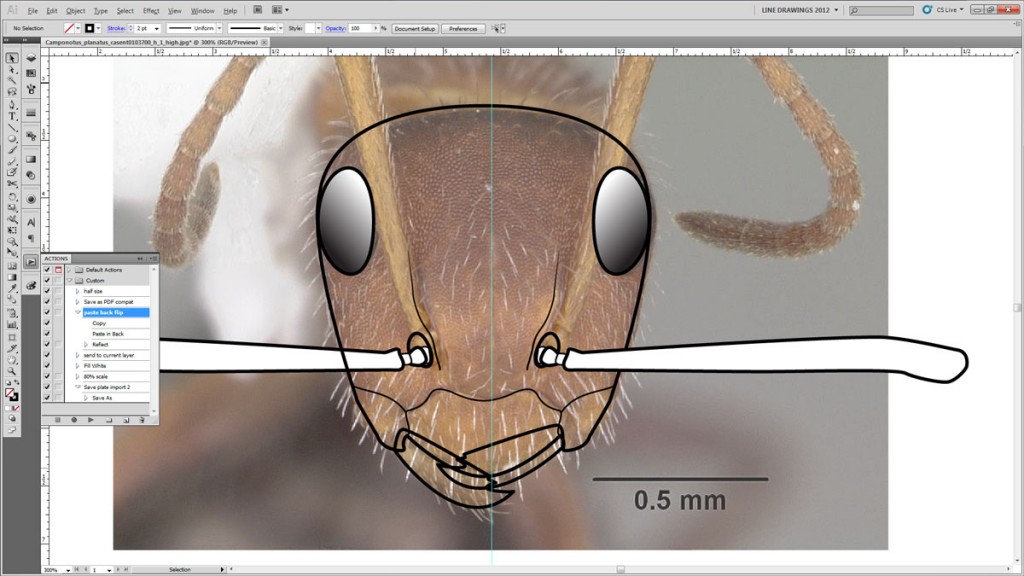
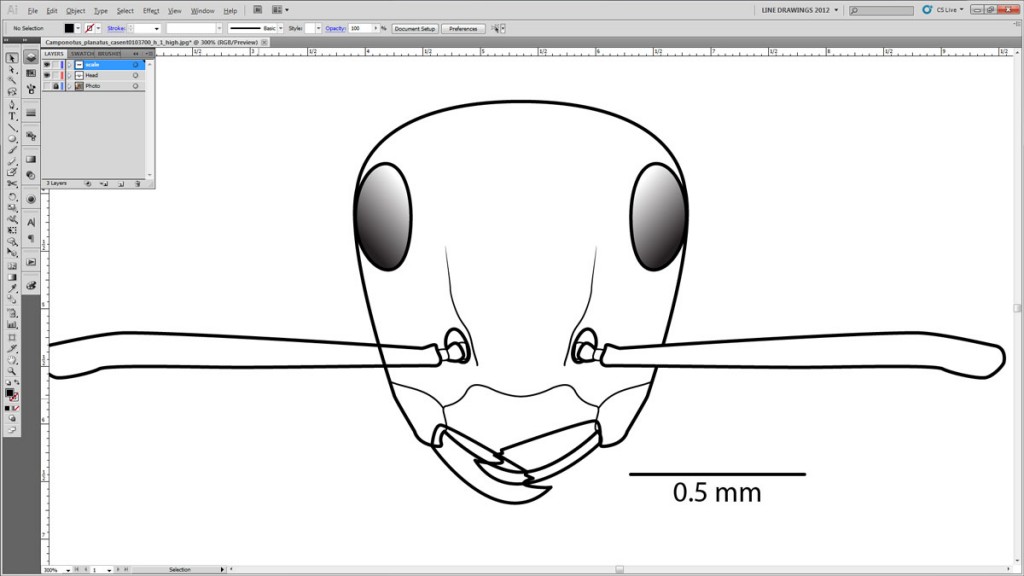
Step 11. Now I like to do the mandibles. I’ll do whichever is in front, then copy, paste and reflect it for the back one. Again, make sure to close the shape. Don’t worry about the inner margin overlapping the clypeus — that will get sorted out later.
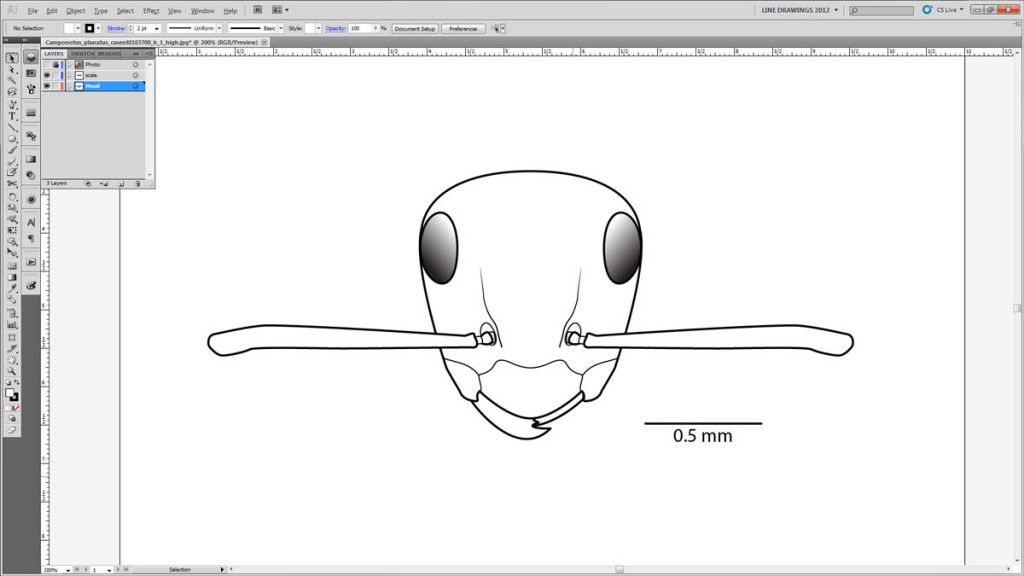
Step 12. Hide the photo template layer.
Step 13. Fill in the head and mandibles with white (or a different color if you prefer). Then arrange different elements backwards and forwards within the layer to achieve the proper order.
Now you’re done! At this point you can adjust the artboard (CS5 only), add text, etc. If you want to add hairs, follow the directions of my illustrating ant hairs post.

Leave a Reply